Servo control
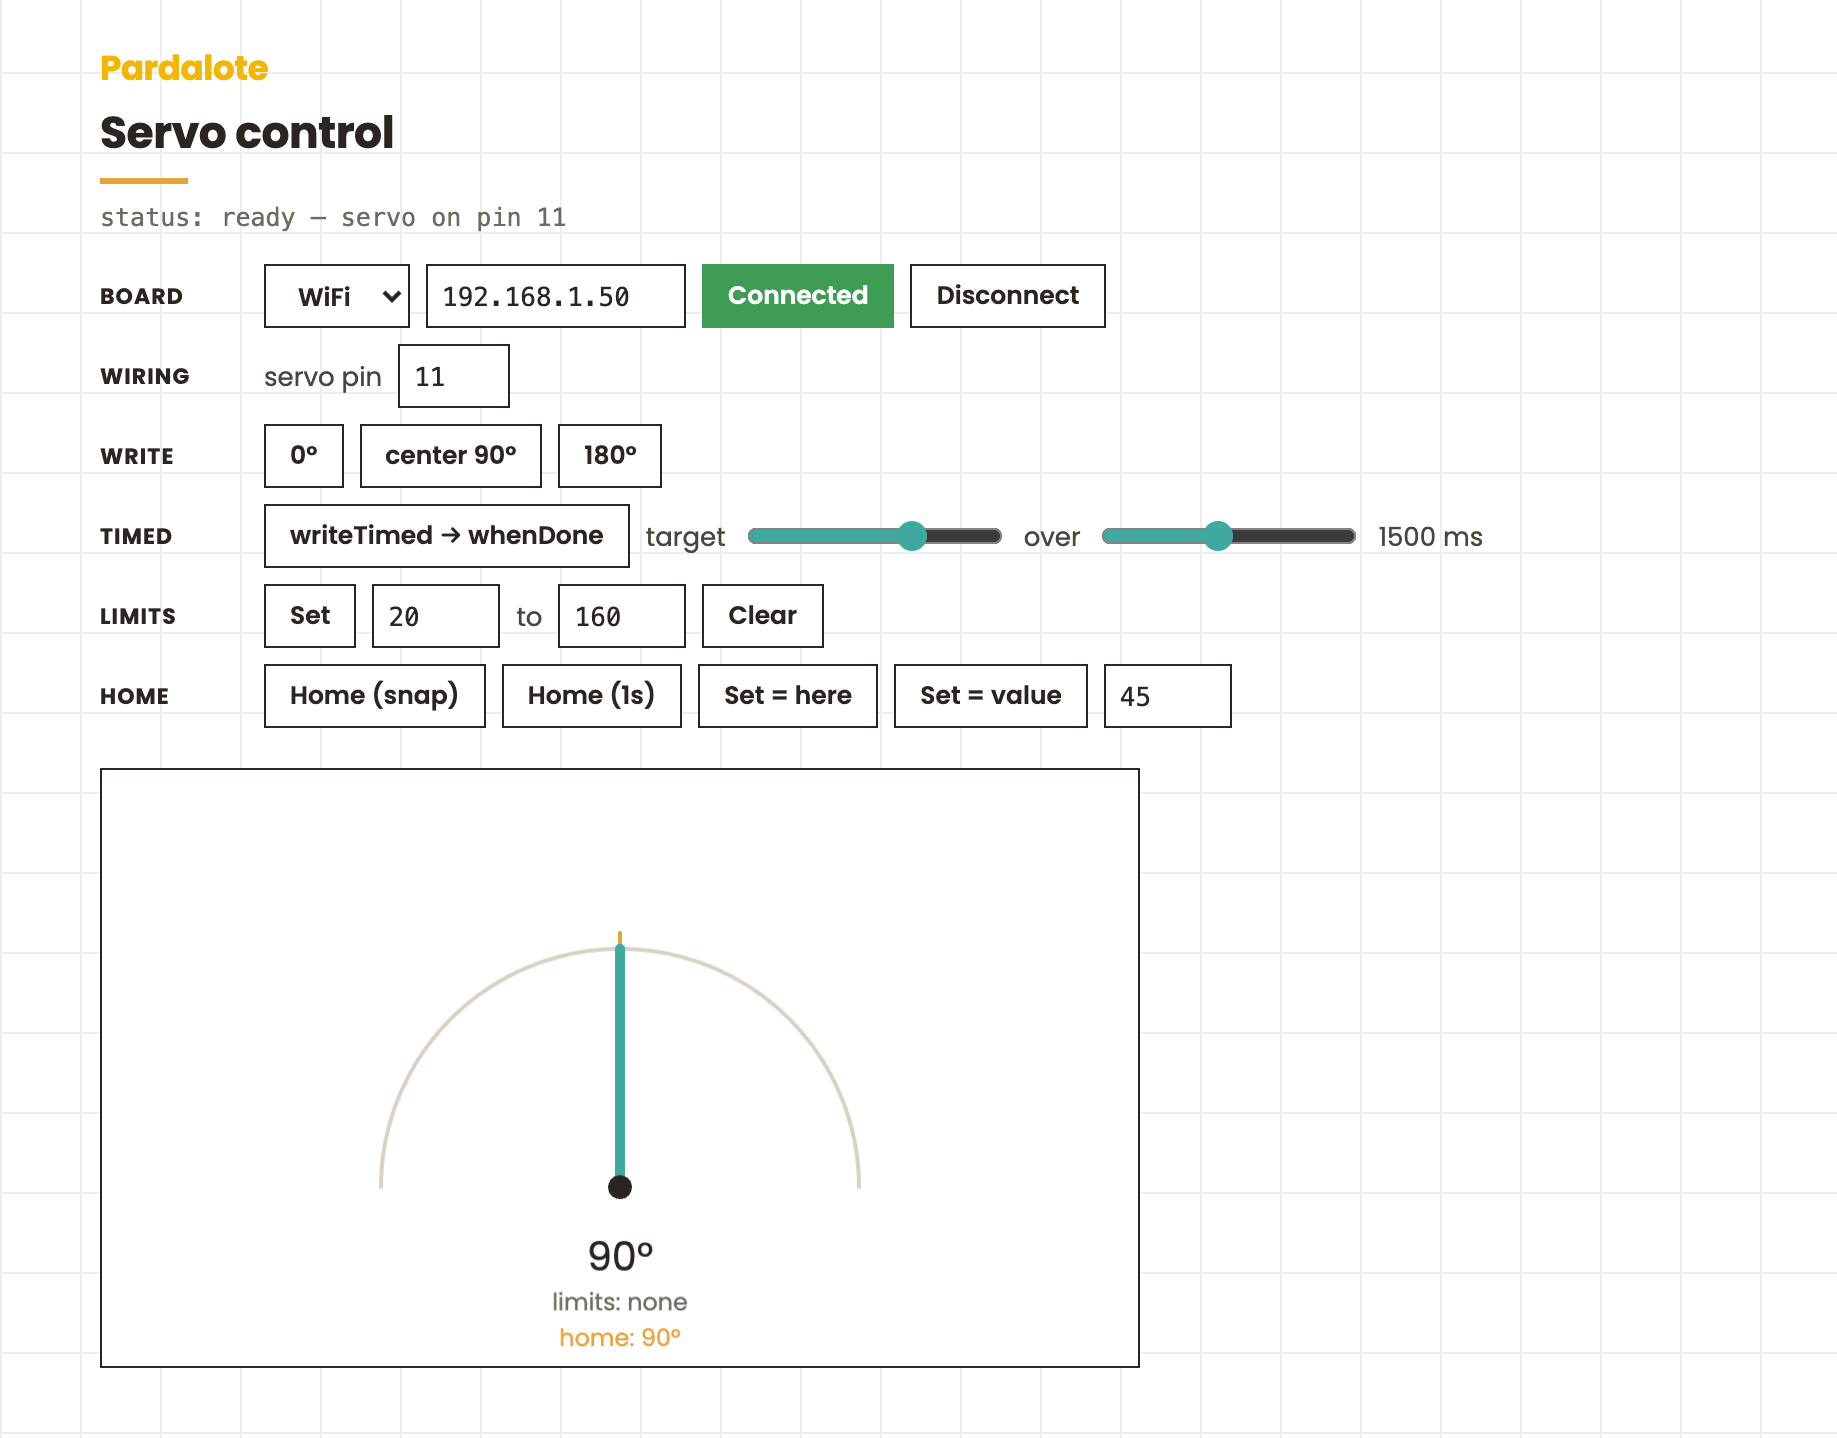
A p5.js control panel for one servo — a Pardalote tool that works out of the box (the connection and servo pin are set on the page and remembered by the browser, no code editing). A live gauge draws the arm and every command updates it in real time. Use it to exercise the modern servo API, or to drive the servo directly by dragging the arm.
What This Example Does
- Drag the arm: grab the arm on the gauge and drag to aim the servo — a direct
write()by pointer. The arm tracks the applied angle, so a drag past a soft limit stops at the allowed band. - Immediate writes: the
0°,center 90°, and180°buttons callwrite(). - Timed move + arrival:
writeTimed(target, duration)interpolates on the board; an awaitedwhenDone()logsarrived/TIMEOUTwith the elapsed time. - Soft limits:
setLimits(min, max)clamps on the Arduino — the clamp shows on the gauge (teal band) and in the log;clearLimits()removes them. - Home:
setHome()(here) orsetHome(value), thenhome()to snap back orhome(1000)to glide. - Live gauge + call log: the arm shows
arduino.myServo.angle— the value the library actually applied — alongside the current limits and home angle, with a rolling log of the last few calls underneath.
Hardware Requirements
- Arduino UNO R4 WiFi or ESP32 development board
- Servo motor (standard 5 V hobby servo)
- Arduino and browser must be on the same WiFi network
Wiring
| Servo wire | Arduino |
|---|---|
| Power (red) | 5 V |
| Ground (brown/black) | GND |
| Signal (orange/yellow) | Pin 11 (set on the page — the Wiring row) |
For more than one or two servos, power them from an external 5 V supply rather than the Arduino's 5 V pin.
Arduino libraries
Install via Arduino IDE → Tools → Manage Libraries:
WebSocketsServer(by Markus Sattler)ESP32Servo(ESP32 only — not needed for UNO R4)
Install Pardalote itself by copying pardalote-arduino/library/Pardalote/ into your Arduino libraries folder (see the top-level README).
Quick Start
1. Upload the firmware
-
In Arduino IDE: File → Examples → Pardalote → servo-control. The sketch is two lines:
Arduino#include <Pardalote.h> #include <PardaloteServo.h> void setup() { Pardalote.begin(); } void loop() { Pardalote.run(); } -
Select your board and upload
-
Open the Serial Monitor at 115200 baud — on first boot Pardalote asks for your WiFi credentials:
=== Pardalote ===
No WiFi networks stored.
=== WiFi Configuration ===
[a]dd  [d]elete  [c]lear all  [s]how  [x] exit
> a
SSID: YourWiFiName
Password: ********
Saved: YourWiFiName
> x
Credentials are saved to EEPROM and survive re-uploads. Press
win the Serial Monitor at any point while the board is trying to connect to update them.Prefer compile-time credentials? Create a
secrets.hfile in the sketch folder with:Arduino#define SECRET_SSID "YourWiFiName" #define SECRET_PASS "YourWiFiPassword"If both are configured,
secrets.his tried first. -
Find your Arduino's IP address:
- UNO R4 WiFi: scrolls across the LED matrix
- ESP32: printed in the Serial Monitor
2. Open the example
This is a tool — it works out of the box, no code editing:
- Open
index.htmlin a browser. - Type the board's IP into the Board IP row and press Connect.
- Set the servo pin in the Wiring row under the gauge (default 11) — changing it reconnects and re-attaches.
The browser remembers the IP and pin, so next visit it reconnects with one
click. Each control row exercises one part of the servo API — immediate
writes, timed moves with an awaited whenDone(), soft limits (watch the
clamp appear in the log and on the gauge), and set-home / go-home — with a
live gauge and call log underneath.
How It Works
arduino = new Arduino();
arduino.add('myServo', new Servo());   // register the extension
setupConnection(arduino, { store: 'pardalote-servo-control' });   // Board row + connection (connect.js)

// attach + centre once the board is ready (the servo pin is the Wiring row's field)
arduino.on('ready', () => {
    arduino.myServo.attach(11);   // servo pin
    arduino.myServo.center();     // 90°
});
A timed move with awaited arrival:
const move = arduino.myServo.writeTimed(target, duration);  // interpolated on-board
const ok   = await move.whenDone();   // true = arrived, false = safety timeout
The gauge tracks arduino.myServo.angle — the value the library actually
applied, already clamped to any soft limits — so a clamped command is visible
on screen (and noted in the log). A PWM servo has no position feedback:
angle is the commanded value, which for a hobby servo is its state.
Script loading order
Include the pardalote.js bundle (core + every extension) before your sketch:
<script src="../../lib/pardalote.js"></script>
<script src="sketch.js"></script>
Troubleshooting
"Servo doesn't move"
- Check wiring: signal to the pin set in the Wiring row (default 11), power to 5 V, ground to GND
- Verify the firmware sketch has
#include <PardaloteServo.h> - Check the browser console for connection errors
"Servo jitters"
- Dragging the arm calls
write()rapidly — the library coalesces these with a built-in 20 ms throttle, but if the servo still jitters check its power supply (give it its own 5 V and a common ground) - Raise the change threshold to ignore sub-degree wobble:
arduino.myServo.setWriteThreshold(2)
"Servo moves to wrong position on startup"
center()moves to 90° — if the servo arm is mounted off-centre this is mechanical, not a code issue
File Structure
servo-control/
├── index.html      # Canvas page (loads p5.js and the pardalote.js bundle)
├── sketch.js       # Servo control and visualisation
├── connect.js      # Board connection UI (WiFi / USB, remembered per browser)
└── README.md       # This file

dist/
└── pardalote.js    # Pardalote bundle (core + all extensions)
Next Steps
- Up to 8 servos simultaneously:
arduino.add('tilt', new Servo()) - Fine-grained control:
arduino.myServo.writeMicroseconds(1500) - Custom pulse range:
arduino.myServo.attach(7, 544, 2400) - Combine with a sensor: map
analogRead()directly to servo angle